Our stitching fabric arrives to us on large continuous bolts. Zweigart makes our linens, aida, and Lugana evenweave of choice, and we also use Permin aida and Jobelan, depending on availability.

The fabric is first cut down into half-yard or one-yard pieces prior to dyeing. My preference is to dye in fat-half-yard pieces for a few reasons - physically, the fabric is heavy when wet during the dyeing process and it's easier to manage in smaller pieces. But more importantly, a smaller piece of fabric allows me greater control over the way the dye affects the piece in a uniform manner. My fabric dyeing style (and personal stitching preference) is for fabrics that are more subtle in their variegation and mottling, and I've found that working with half-yard pieces produces a result that I'm happiest with.
Once the fabric is cut into dyeing-size pieces from the bolt, the cut edges are serged. If you've ever had the experience of washing a piece of linen or aida without finished edges, you might have opened your washer to find a spaghetti mess of frayed ends. Serging before dyeing prevents a lot of headaches and wasted inches.

Each fabric type is tagged and stored, waiting to be dyed. We could use a bit more fabric on the shelves!

When it comes time to dye, the fabrics go into the washing machine for a good soak and scouring with an odorless textile detergent. Zweigart linens in particularly come with sizing applied to them - an added material that serves to "starch" and stiffen the fabric. Washing the fabric prior to dyeing removes this barrier and allows the dye to more uniformly penetrate the fabric, producing a more even result. I also believe that dyeing damp as opposed to dry fabrics produces a more diffused mottling, so that's an added bonus.
We have a dedicated washing machine in the studio that only handles our dyed fabrics.

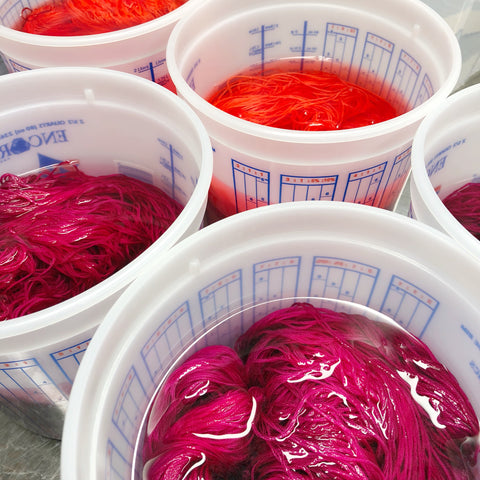
From the washing machine, the fabrics go straight to the "dye pots"where they are dyed using a modified low immersion dyeing technique.
We use a textile industry standard fiber reactive dye for all of our fabrics and threads. If you've ever tie-dyed, you likely used this type of dye. It's mixed from a powder concentrate and produces a colorfast and lightfast dye result.
The liquid dye is mixed in batches depending on the amount of fabric to be dyed that day. Depending on the color, it only takes about one cup of liquid to dye a fat-half-yard of fabric.


Once the dye has been applied, the fabric sits for anywhere from 12-24 hours. Then back to the rinsing process they go. They are washed again at least once (or twice with an extra rinse for dark and saturated colors) in the washing machine, until there is no color bleed from the fabric.

The fabrics are then line and air dried. While it takes considerably longer to dry, especially in the humid summers of St. Louis, I feel that machine drying fabrics is just a bit too rough on the delicate linens and aida, and it creates a harsher feel in hand (plus, it creates more fuzz than you could believe!)
A pile of dried linens waiting to be ironed. Many will be cut into fat quarter and fat eighth yard pieces and the new cut edges will be serged again.

The fabrics are steam ironed with just a touch of a scent-free starching agent. I made my own ironing board in a rectangular shape to accommodate full pieces of fabric after seeing some inspiration from quilters who made their own pressing boards (which, by the way, is something I'd highly recommend if you iron a lot of fabric for quilting. It wouldn't be so great for finished cross stitch projects as it might flatten the stitches too much, but it's otherwise a wonderful little thing to have around. You can check out the free tutorial I used here.)

Always lots of ironing to be had around here! Luckily, my grandma "Gigi" often comes to the studio and irons with me, and boy, is she fast.
After ironing, if the fabric is a new colorway, we'll give it a brief photo shoot in a special light box. I do my very best to take accurate colors of each fabric, and sometimes a little photo editing is necessary, to make sure the color is reflected as closely as possible.

And finally, the fabric is folded and tagged with labels, ready to find their new homes. And that is how our colorful little fabrics come to be. 😊 I hope you've enjoyed a little peek behind the scenes!